Reprinting POS Sessions
This is a guide to printing Till Session Reports for sessions on MSL POS that have been closed.
Contents
Step One - Opening POS
- Open a new session on MSL POS on the laptop on which the past session of POS was opened. If you do not know which laptop the session was opened on, then you will have to work by process of elimination through each till.
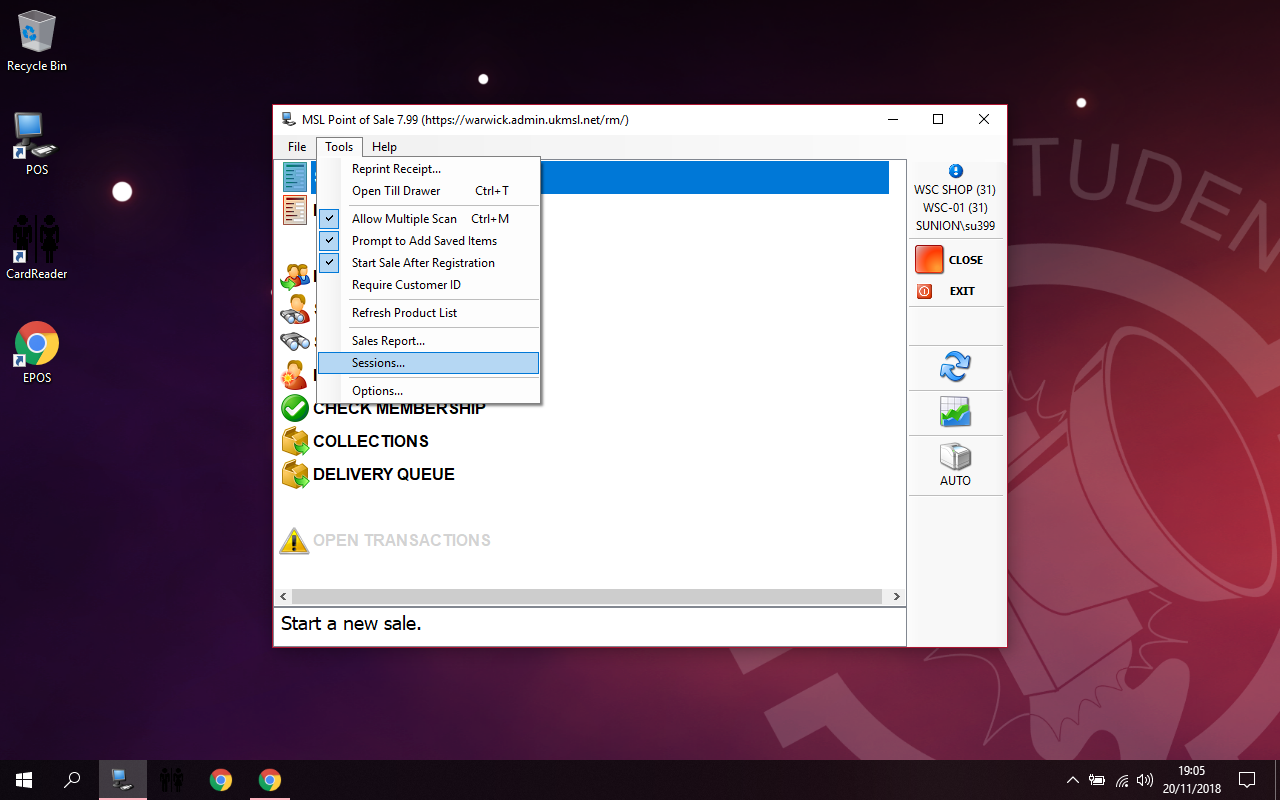
- Once the session has been opened, go to 'Tools' and then select 'Sessions', as per the image below.
Step Two - Finding the Session
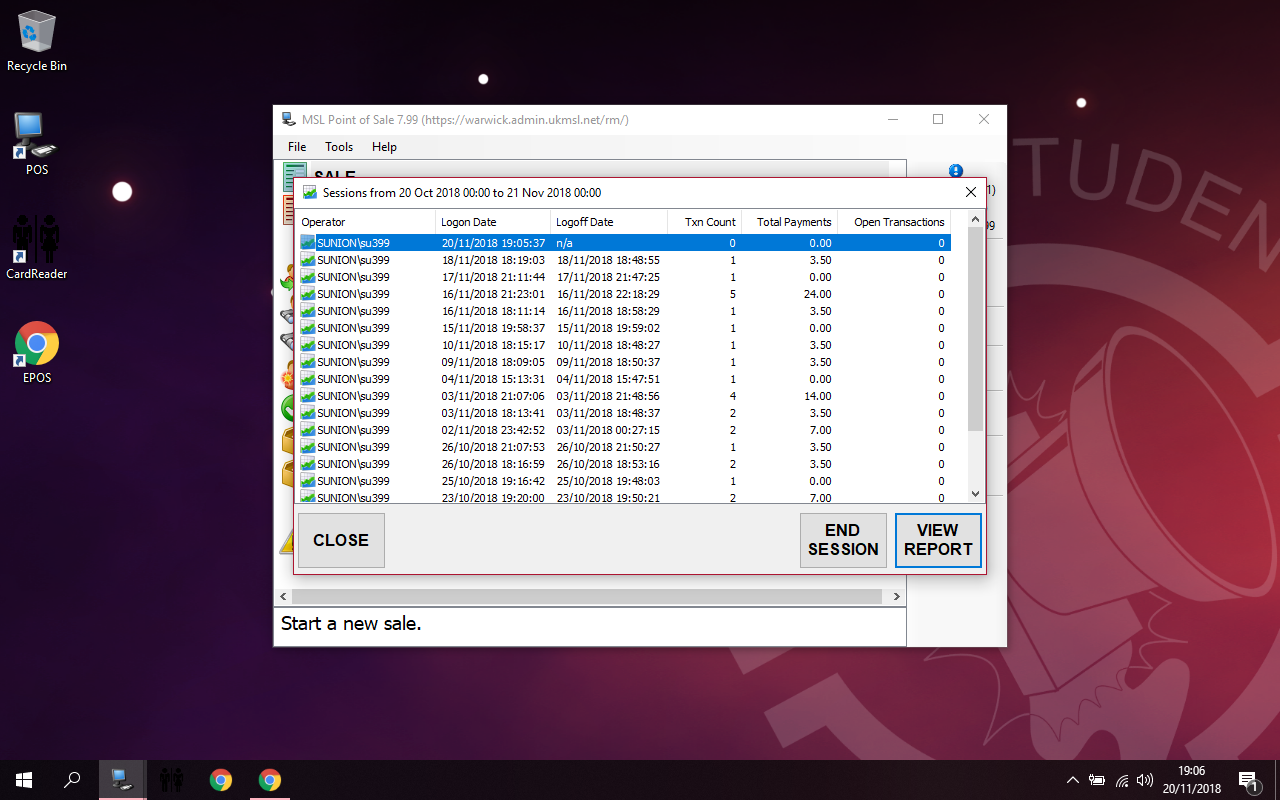
- Once you have pressed 'Sessions', this will open up a list of all past sessions on this laptop, as per the image below. It does not list the session IDs, so you will have to identify the session by when it was opened and closed. Once you have found the relevant session, click 'View Report'.
Step Three - The Session
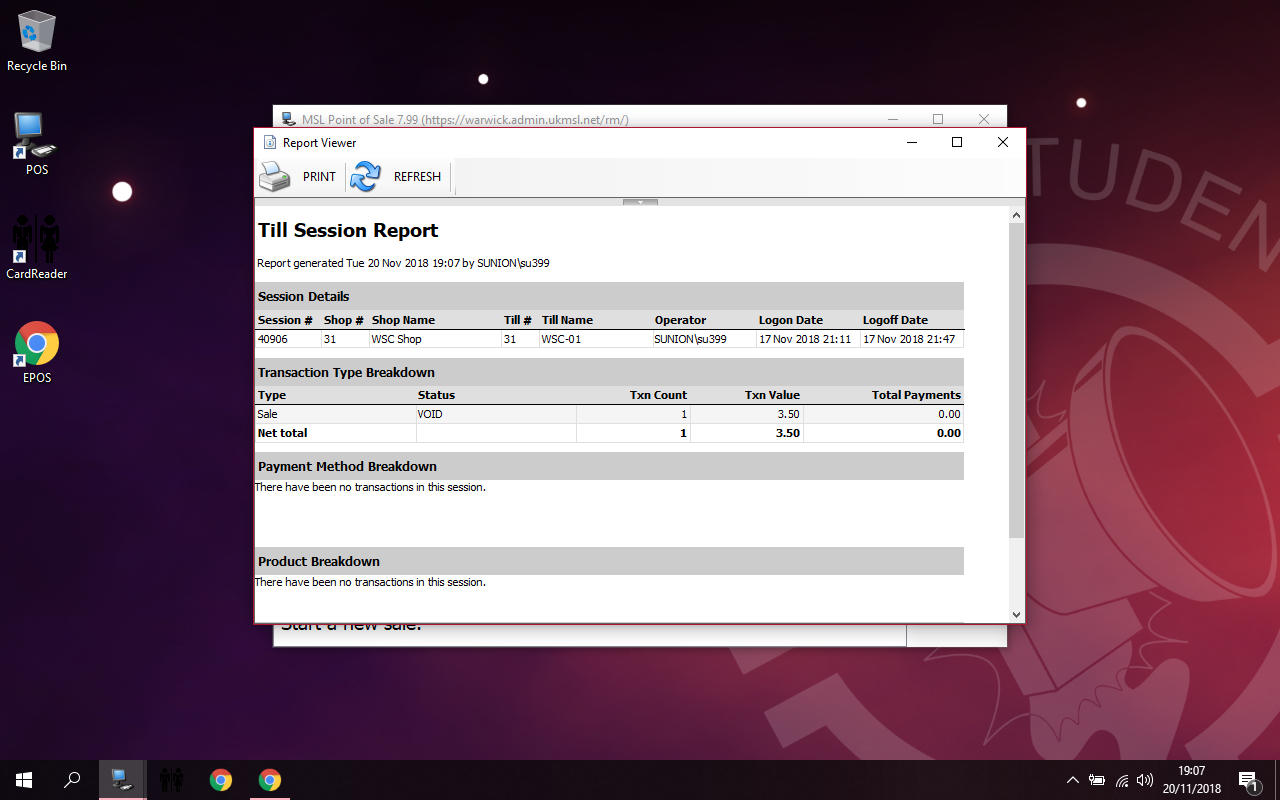
- Once you have pressed 'View Report', the Till Session Report for the session will come up, as per the image below.
Step Four - Print to PDF
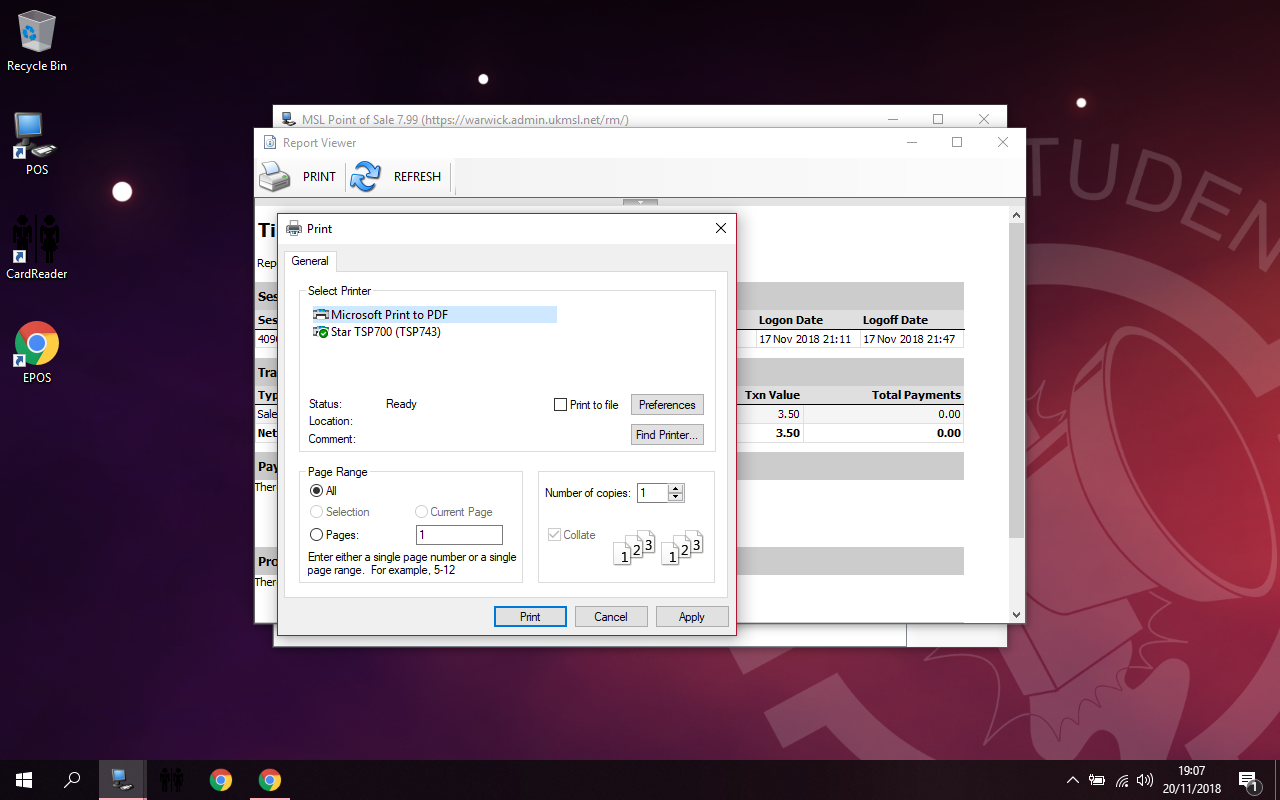
- As you will notice, this is in a different format to the reports that are usually printed out, and as such cannot be printed out at the tills. Instead, it should be printed out in A4 format. In order to do this, press 'Print'. Then, select 'Microsoft Print to PDF' (you might have to scroll sideways to see all the printing options) as the printer and print, as per the image below.
Step Five - Printing the Session
- After this, the session can be saved as a PDF. This PDF should then be transferred, for instance via Email, to a computer which can print the file out in A4, such as the office printer. This PDF can then be printed out and stapled to the Treasurer's Tray Return as necessary, possibly after cutting down to an appropriate size. If this has been done after the Treasurer's Tray Return has already been printed, then the POS session ID of this additional session should be added manually to the return.


